
Ever dreamt of building your own virtual worlds, crafting compelling stories, or designing the next big indie hit? The realm of Game Development with Unity is more accessible than ever, and at its heart lies the power of scripting. For beginners, diving into game creation at home is not just a valuable skill-building exercise but an incredibly inspiring journey that transforms abstract ideas into interactive experiences. This post will guide you through getting started with Unity C# Scripts, demystifying the process and setting you on a path to game development mastery.
Materials & Supplies
Before you embark on your game development adventure, you’ll need a few essential tools.
- Computer: A decent PC or Mac with at least 8GB RAM is recommended. You don’t need a supercomputer to start, but good processing power helps.
- Game Engine: Unity is our engine of choice here, renowned for its user-friendliness and robust features. Download the Unity Hub from their official website (it’s free for personal use!).
- Code Editor: Visual Studio Community Edition (free) or Visual Studio Code are excellent choices and integrate seamlessly with Unity.
- Graphics Software (Optional): GIMP or Krita (free) for 2D sprites, Blender (free) for 3D models.
- Audio Tools (Optional): Audacity (free) for sound effects and music.
- Comfort Gear: A reliable setup, perhaps with a responsive Mechanical Gaming Keyboard, can significantly improve your coding experience and productivity during long sessions.
Timing / Development Schedule
Developing a game, even a simple one, follows a general timeline. For a beginner friendly project (like a basic platformer or a ‘Flappy Bird’ clone), plan for:
- Concept & Design (1-2 days): Brainstorm your core idea, define mechanics, and sketch out basic levels. Don’t overthink it; keep it simple.
- Setup & Prep (1 day): Install Unity, your code editor, and get familiar with the interface.
- Coding Phase (3-7 days): This is where you write your Unity C# Scripts for player movement, interactions, and game logic. Break tasks into small, manageable chunks.
- Asset Creation (2-5 days): Design or find your game’s visual and audio elements. Free assets are abundant on the Unity Asset Store or sites like OpenGameArt.
- Testing & Debugging (2-3 days): Play your game constantly. Identify bugs, tweak mechanics, and refine the user experience.
- Polish & Publishing (1-2 days): Add final touches, create a simple menu, and prepare for sharing.
Step-by-Step Instructions
Let’s break down how to start with Unity C# Scripts for a simple game:
- Project Setup: Open Unity Hub, create a new 2D or 3D project.
- Scene Creation: In Unity, right-click in the Hierarchy, select “2D Object” or “3D Object,” and add a “Sprite” (2D) or “Cube” (3D) as your player.
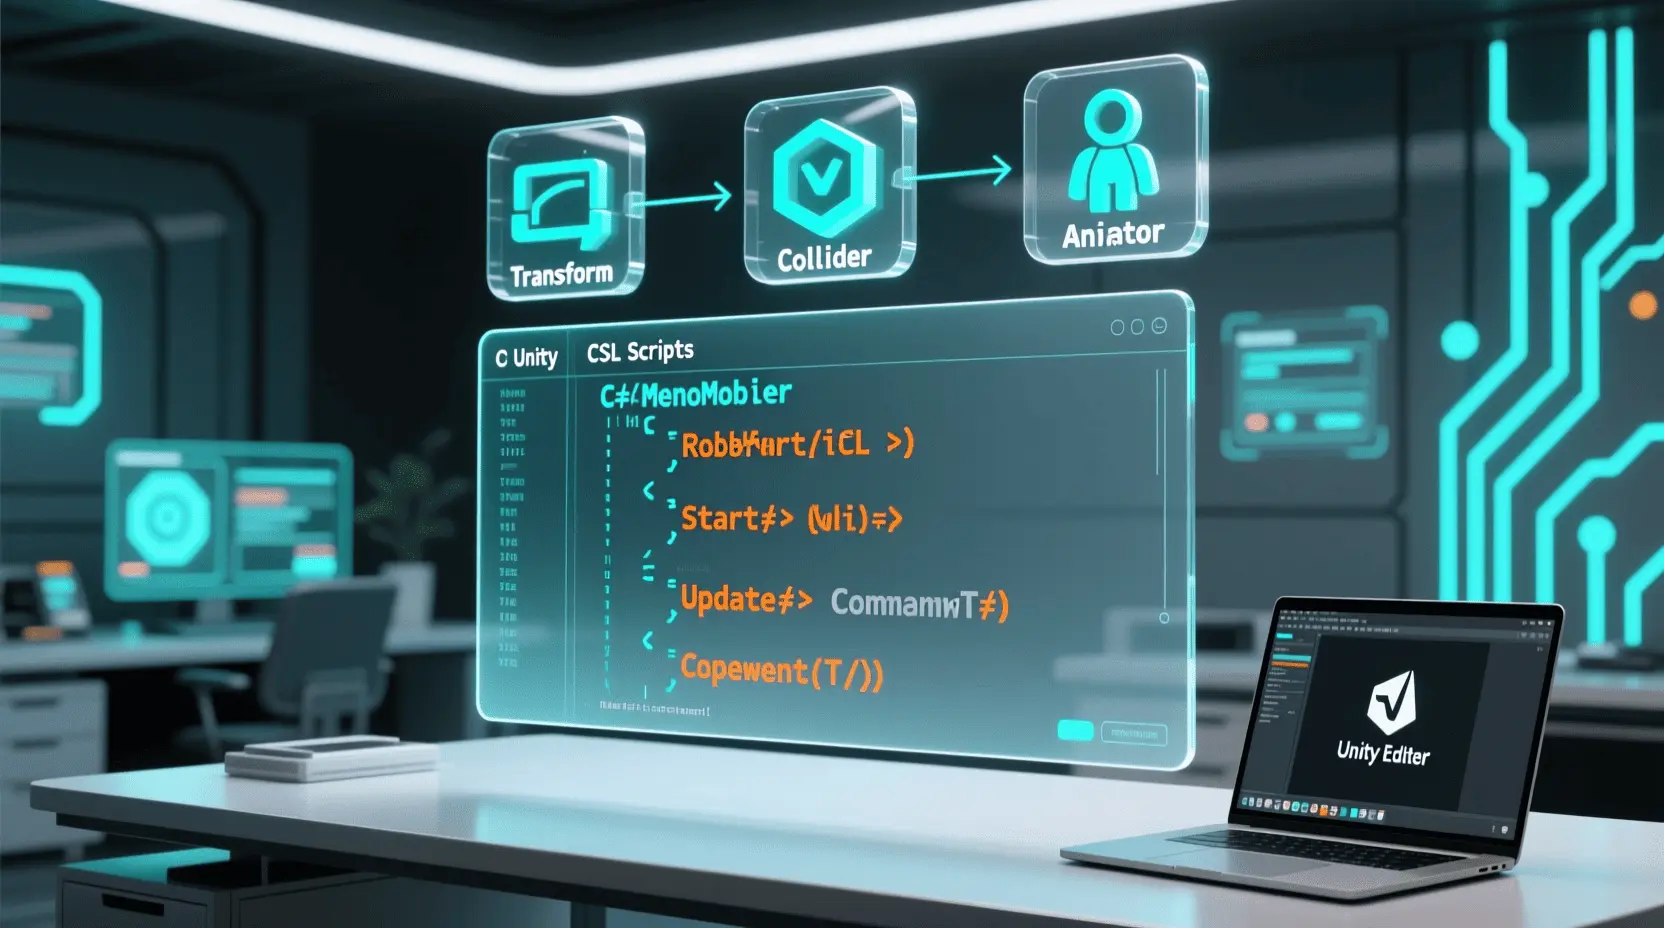
- Attach a Script: Right-click in the Project window, select “Create > C# Script.” Name it “PlayerMovement” and drag it onto your player object in the Hierarchy.
- Basic Movement Script: Double-click the script to open it in your code editor. Write simple C# code in the
Update()function to move your player based on input (e.g.,transform.Translate(Vector3.right * speed * Time.deltaTime);). - Add Physics: Add a
Rigidbody2DorRigidbodycomponent to your player for gravity and collisions. - Create Obstacles: Duplicate your player object or create new shapes as obstacles. Add Colliders to them.
- Test & Iterate: Hit the Play button! Does it work? Does it feel right? Tweak your script values (speed, jump force) until it does.
Advantages of Learning Game Development
Learning game development at home, especially with Unity C# Scripts, offers immense benefits. It hones your problem-solving abilities, enhances logical thinking, sparks creativity, and develops project management skills. Beyond the technical prowess, it fosters teamwork (even if you’re collaborating online) and opens doors to lucrative career opportunities in software engineering, simulation, and interactive media. Building games is a powerful way to merge artistic vision with technical execution.
Tips, Alternative Methods, or Development Advice
- Start Small: Your first game should be incredibly simple. Think “Pong” or a basic endless runner.
- 2D Before 3D: Many beginners find 2D game development less complex, allowing them to grasp core concepts before tackling the additional complexities of 3D.
- Visual Scripting: Consider Unity’s Bolt (now included free) or Playmaker if C# feels daunting initially. These tools help visualize logic before you dive deep into coding.
- Limited Hardware/Time: Optimize your Unity settings, use low-poly assets, and break your development into short, focused sessions.
- Community & Tutorials: Leverage online tutorials (YouTube, Unity Learn), and actively participate in developer communities (Discord, forums) for support and inspiration.
Common Mistakes to Avoid
- Overcomplicating the First Project: This is the #1 reason beginners quit. Scope creep is real! Start with a minimal viable product.
- Neglecting Testing: Test frequently and thoroughly. Don’t wait until the end to discover game-breaking bugs.
- Ignoring Player Feedback: Even early feedback from friends or family can reveal critical design flaws or areas for improvement.
- Copy-Pasting Code Without Understanding: Always strive to understand why a particular piece of code works. This builds foundational knowledge.
- Poor Version Control: Not using Git or a similar system can lead to lost work or difficulty tracking changes.
Maintenance / Update Tips
Once your game is “done,” the journey isn’t over.
- Version Control: Use Git (e.g., with GitHub Desktop or GitLab) to track changes and revert if necessary.
- Bug Fixes: Continuously monitor for and address bugs.
- New Content: Keep players engaged by adding new levels, characters, or features.
- Player Feedback: Set up channels (e.g., Discord) to collect feedback and guide future updates.
- Organization: Keep your Unity project folders tidy and script comments clear for easier long-term maintenance.
- Backups: Regularly back up your project files to a cloud service or external drive.
Conclusion
Learning Game Development with Unity at home, especially mastering Unity C# Scripts, is a rewarding endeavor. It’s a journey of creativity, problem-solving, and continuous learning. Start with small, achievable projects, practice consistently, and don’t be afraid to share your creations. Every line of code, every designed asset, brings you closer to realizing your unique game vision. Keep experimenting, keep building, and keep having fun!
FAQs
Q: What programming language should I start with?
A: For Unity, C# is the primary language and an excellent choice for beginners due to its clear syntax and extensive documentation.
Q: Which game engine is best for beginners?
A: Unity is widely recommended for beginners because of its vast community, comprehensive tutorials, and robust free version.
Q: How long does it take to make a small game?
A: A very small, simple game (like Pong or a basic platformer) can take anywhere from a few days to a few weeks, depending on your commitment and prior knowledge.
Q: Do I need to know coding to start?
A: While helpful, it’s not strictly necessary to know coding beforehand. Unity and C# are excellent tools to learn coding from scratch, often in a more engaging context. Visual scripting tools also exist as an entry point.
Q: Where can I publish my first game?
A: You can publish your game on platforms like itch.io (great for indies and beginners), share it with friends, or even aim for mobile app stores like Google Play or Apple App Store for simple projects.
interface sounds OGG
interface sounds, UI sound effects, UX sound effects, game UI sounds, mobile UI audio, notification sound effects, button click SFX, menu sounds, toggle switch sounds, error alert sounds

beyerdynamic DT 770 PRO 80 Ohm Over-Ear Studio Headphones in Gray
beyerdynamic DT 770 PRO 80 Ohm Over-Ear Studio Headphones in Gray. Enclosed Design, Wired for Professional Recording and Monitoring
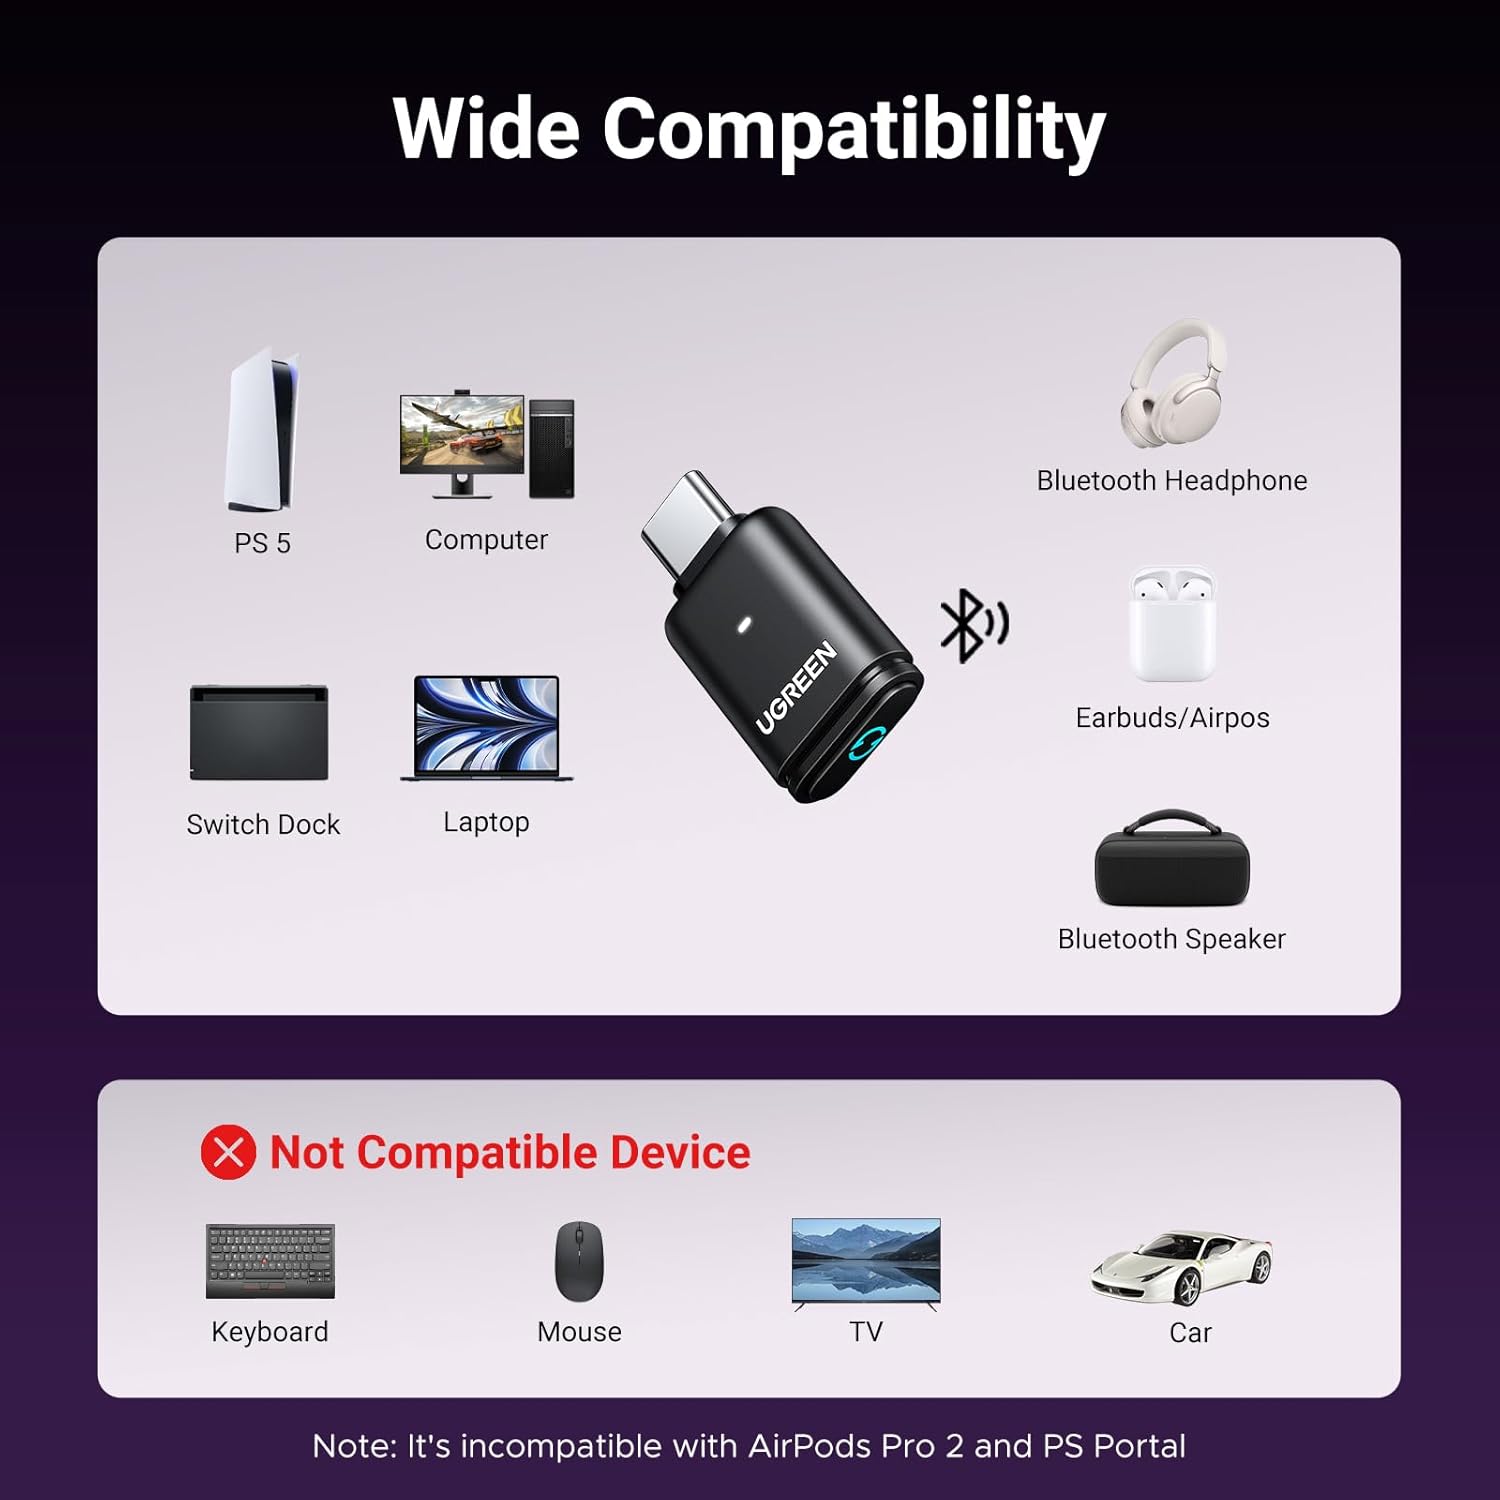
UGREEN USB-C Bluetooth Adapter for PS5
UGREEN USB-C Bluetooth Adapter for PS5, Bluetooth 5.3 Audio Adapter with APTX Low Latency & aptX-Adaptive, Wireless Audio Transmitter to Connect Wireless Headphones & Earbuds

NUBWO U3 Gaming Headset
NUBWO U3 Gaming Headset with Microphone, Safe Volume Limited, Kids Headphones for Switch, Super Lightweight, Rich Sound, 3.5mm Jack for NS, PS4, PS5, Xbox, Tablet, iPad Computer, Red