
If you’ve ever opened a game engine and thought, “Okay… now what?” you’re not alone.
Programming a game from scratch can feel overwhelming at first. There are scenes, scripts, physics, animations, UI systems, and dozens of panels staring back at you.
But here’s the truth:
Every game no matter how big is built from a handful of simple systems working together.
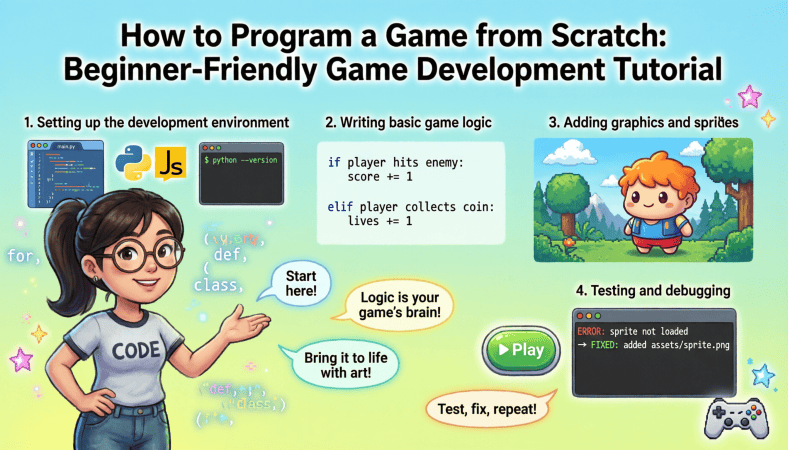
In this beginner-friendly tutorial, you’ll learn how to program a game from scratch step-by-step, understand the core concepts behind game development, and build a solid foundation that prepares you for multiplayer and online deployment later.
What “Programming a Game from Scratch” Really Means
When we say “from scratch,” we don’t mean building your own graphics engine or physics engine.
Instead, we mean:
-
Starting with a blank project
-
Writing your own gameplay logic
-
Creating your own mechanics
-
Connecting systems together
You’ll typically use a beginner-friendly engine like:
-
Unity 3D (C#)
-
Godot Engine (GDScript)
-
Unreal Engine (C++ or Blueprints)
For this guide, the concepts apply to all engines even if the syntax differs.
Step 1: Understand the Game Loop (The Heart of Every Game)
Every game runs on something called a game loop.
It works like this:
-
Check for player input
-
Update game logic
-
Render the frame
-
Repeat (60+ times per second)
In Unity, this often happens inside:
-
Update()function
In Godot:
-
_process(delta)
In Unreal:
-
Tick function
Understanding this loop changes how you think about games. Instead of static screens, you start thinking in continuous updates.
Example (Unity C#):
This runs every frame.
That’s the engine constantly asking:
“What should happen next?”
Step 2: Create Player Movement
The first milestone of any beginner game is simple movement.
This teaches you:
-
Input handling
-
Position updates
-
Frame-based logic
Basic movement example (Unity C#):
What’s happening here?
-
The engine checks for keyboard input
-
It calculates movement
-
It updates the player’s position
That’s it.
Movement is just math applied every frame.
Step 3: Add Collision Detection
Games become interactive when objects can collide.
Collision systems allow:
-
Detecting when player touches an enemy
-
Detecting ground for jumping
-
Triggering events
Example (Unity):
Now your game reacts to interaction.
This is where games stop being demos and start feeling real.
Step 4: Implement Jumping Mechanics
Jumping teaches physics fundamentals.
To make a character jump, you:
-
Check if player presses jump key
-
Apply upward force
-
Ensure player is grounded
Example:
Now you’re using physics instead of manually changing position.
That’s a major leap forward in understanding engine systems.
Step 5: Build a Basic Enemy AI
AI sounds intimidating but basic AI is just logic.
Start simple:
-
If player is near → move toward player
-
If health is zero → destroy enemy
Example concept:
That’s basic AI.
No machine learning. No complexity.
Just conditional behavior.
Step 6: Add a Score System
Games need feedback loops.
A score system teaches:
-
Variables
-
UI updates
-
Game state tracking
Example:
Now your game has progression.
Small system big impact.
Step 7: Organize Your Code (Very Important)
As your project grows, chaos grows too.
Beginner mistake:
Putting everything in one script.
Better approach:
-
PlayerController.cs
-
EnemyAI.cs
-
GameManager.cs
-
UIManager.cs
Clean separation makes debugging easier and prepares you for larger projects later.
Step 8: Add Basic Sound Effects
Sound dramatically increases immersion.
Add:
-
Jump sound
-
Hit sound
-
Background music
Engines have built-in audio systems. Even simple sounds can make your game feel 10x more polished.
Step 9: Build a Simple Game Menu
Before deployment, you’ll need:
-
Main Menu
-
Start button
-
Quit button
Menus teach:
-
Scene management
-
UI systems
-
State transitions
Example:
Now your project feels structured instead of experimental.
Step 10: Optimize Early (Even for Small Projects)
Even simple games can lag if poorly structured.
Beginner optimization tips:
-
Avoid heavy logic inside Update()
-
Cache references instead of repeatedly searching
-
Use object pooling for repeated objects
Learning this early saves major headaches later — especially if you plan multiplayer deployment.
Preparing for Multiplayer Later
Even if you’re building single player now, think ahead:
-
Keep gameplay logic modular
-
Separate input from game state
-
Avoid hardcoding values
Multiplayer games require:
-
Server authority
-
Synchronization
-
Validation
Clean structure now makes networking easier later.
Common Beginner Mistakes to Avoid
-
Starting too big (MMORPG as first project 😅)
-
Skipping fundamentals
-
Copy pasting tutorials without understanding
-
Ignoring code organization
-
Quitting before finishing a small project
Finish something small.
Then improve.
A Simple Beginner Project Roadmap
If you want a realistic path:
Week 1–2:
-
Player movement
-
Jumping
-
Collisions
Week 3–4:
-
Enemy AI
-
Score system
-
UI
Week 5–6:
-
Sound effects
-
Menu system
-
Polish
After 6 weeks, you’ll have:
-
A complete small game
-
Solid programming fundamentals
-
Confidence to move toward multiplayer
From Coding to Deployment
Once your game works locally:
Next steps include:
-
Building export versions (PC, Web, Mobile)
-
Testing performance
-
Connecting to a backend server (for multiplayer)
-
Deploying to VPS or cloud hosting
Engines like Unity 3D and Unreal Engine provide networking frameworks that help bridge this gap.
But none of that matters unless you first understand how to build gameplay systems yourself.
Final Thoughts
Programming a game from scratch isn’t magic.
It’s:
-
A loop
-
Some input
-
Some math
-
A few conditional statements
-
Organized systems working together
Start small. Finish something. Improve it.
Most successful developers didn’t start with massive multiplayer worlds.
They started with a moving square.
And built from there.
A Beginner’s Guide to Game Development: From Coding Your Game to Deploying It on an Online Server
interface sounds OGG
interface sounds, UI sound effects, UX sound effects, game UI sounds, mobile UI audio, notification sound effects, button click SFX, menu sounds, toggle switch sounds, error alert sounds

beyerdynamic DT 770 PRO 80 Ohm Over-Ear Studio Headphones in Gray
beyerdynamic DT 770 PRO 80 Ohm Over-Ear Studio Headphones in Gray. Enclosed Design, Wired for Professional Recording and Monitoring
Sound Healing 432 Hz
song transports the listener to a relaxed state of mindfulness and inner peace.

AULA F99 Wireless Mechanical Gaming Keyboard
AULA F99 Wireless Mechanical Keyboard,Tri-Mode BT5.0/2.4GHz/USB-C Hot Swappable Custom Keyboard,Pre-lubed Linear Switches,RGB Backlit Computer Gaming Keyboards for PC/Tablet/PS/Xbox

Canon PG-275
Canon PG-275 / CL-276 Genuine Ink Value Pack (2 Cartridges), Compatible with TS3520/3522/4722/3720/3722, TR4720

NUBWO U3 Gaming Headset
NUBWO U3 Gaming Headset with Microphone, Safe Volume Limited, Kids Headphones for Switch, Super Lightweight, Rich Sound, 3.5mm Jack for NS, PS4, PS5, Xbox, Tablet, iPad Computer, Red